One of the things that really makes the Total theme stand out is that I’ve put a lot of focus on making the theme “modular” so you can easily tweak it or extend it via child theme functions. Creating overlay styles is quite simple since version 1.6.0.
Step 1 Add A New Overlay Style To The Array
First you need to add a new function to your child theme’s function.php file that hooks into the ‘wpex_overlay_styles_array’ filter and adds your new overlays. Your KEY will be used as the filename for the overlay output.
function myadd_new_overlays( $overlays ) {
	$overlays['my-custom-overlay'] = 'My Custom Overlay';
	return $overlays;
}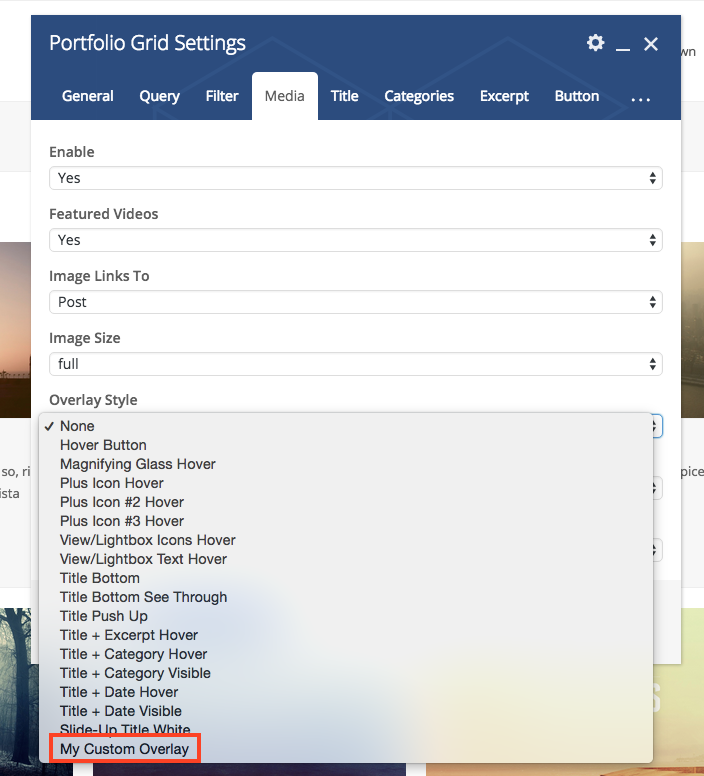
add_filter( 'wpex_overlay_styles_array', 'myadd_new_overlays' );Now you should see your new overlay style ready for use in the Visual Composer:
Step 2 Add Your New Overlay Output File To Your Child Theme For Output
Now create a new "partials" folder in your child theme if you don't have one already. Then inside it create a new "overlays" folder then inside that folder add a new php file with the same name as the KEY used in the array (my-custom-overlay.php). You should follow the same structure as the parent theme, where you will find the same folders mentioned previously.
If you want you can go into your parent theme at partials/overlays/ and copy the code of one of the styles into your new file in the child theme then tweak the code accordingly. However, to ensure full compatibility in the future I HIGLY recommend you create your code from scratch and add your own CSS for showing and hiding this overlay.
NOTE: New wpex_pre_include_overlay_template (alternative to template)
If you don't want to use a template for your custom overlay output you can use the 'wpex_pre_include_overlay_template' action hook to return a custom output for your overlay. Example:
function mycustom_overlay_template(  $style, $args ) {

	// Custom output for YOUR_OVERLAY_NAME
	if ( 'YOUR_OVERLAY_NAME' == $style ) :

		// Only used for inside link position
		if ( 'inside_link' != $args['overlay_position'] ) {
			return;
		}

		// Overlay Ooutput
		$output = 'YOUR OVERLAY OUTPUT';

		// Echo output
		echo $output;

		// Important -> prevents the theme for checking for overlay template part
		return;

	endif;

}
add_action( 'wpex_pre_include_overlay_template', 'mycustom_overlay_template', 20, 2 );
Important $position variable
If you look at the code in the parent theme at Total/partials/overlays/plus-hover.php you will notice the following at the top:
// Only used for inside position
if ( 'inside_link' != $position ) {
	return;
}
Your overlay can be either inside the link that surrounds the image (if it links to a post, custom link or lightbox) or outside the link. For example if you want to have links inside your overlay you will need the overlay placed outside the link so instead your code would look like this:
// Only used for outside position, so return if the $position is inside
if ( 'inside_link' == $position ) {
	return;
}
And that will prevent your code from running inside the link.