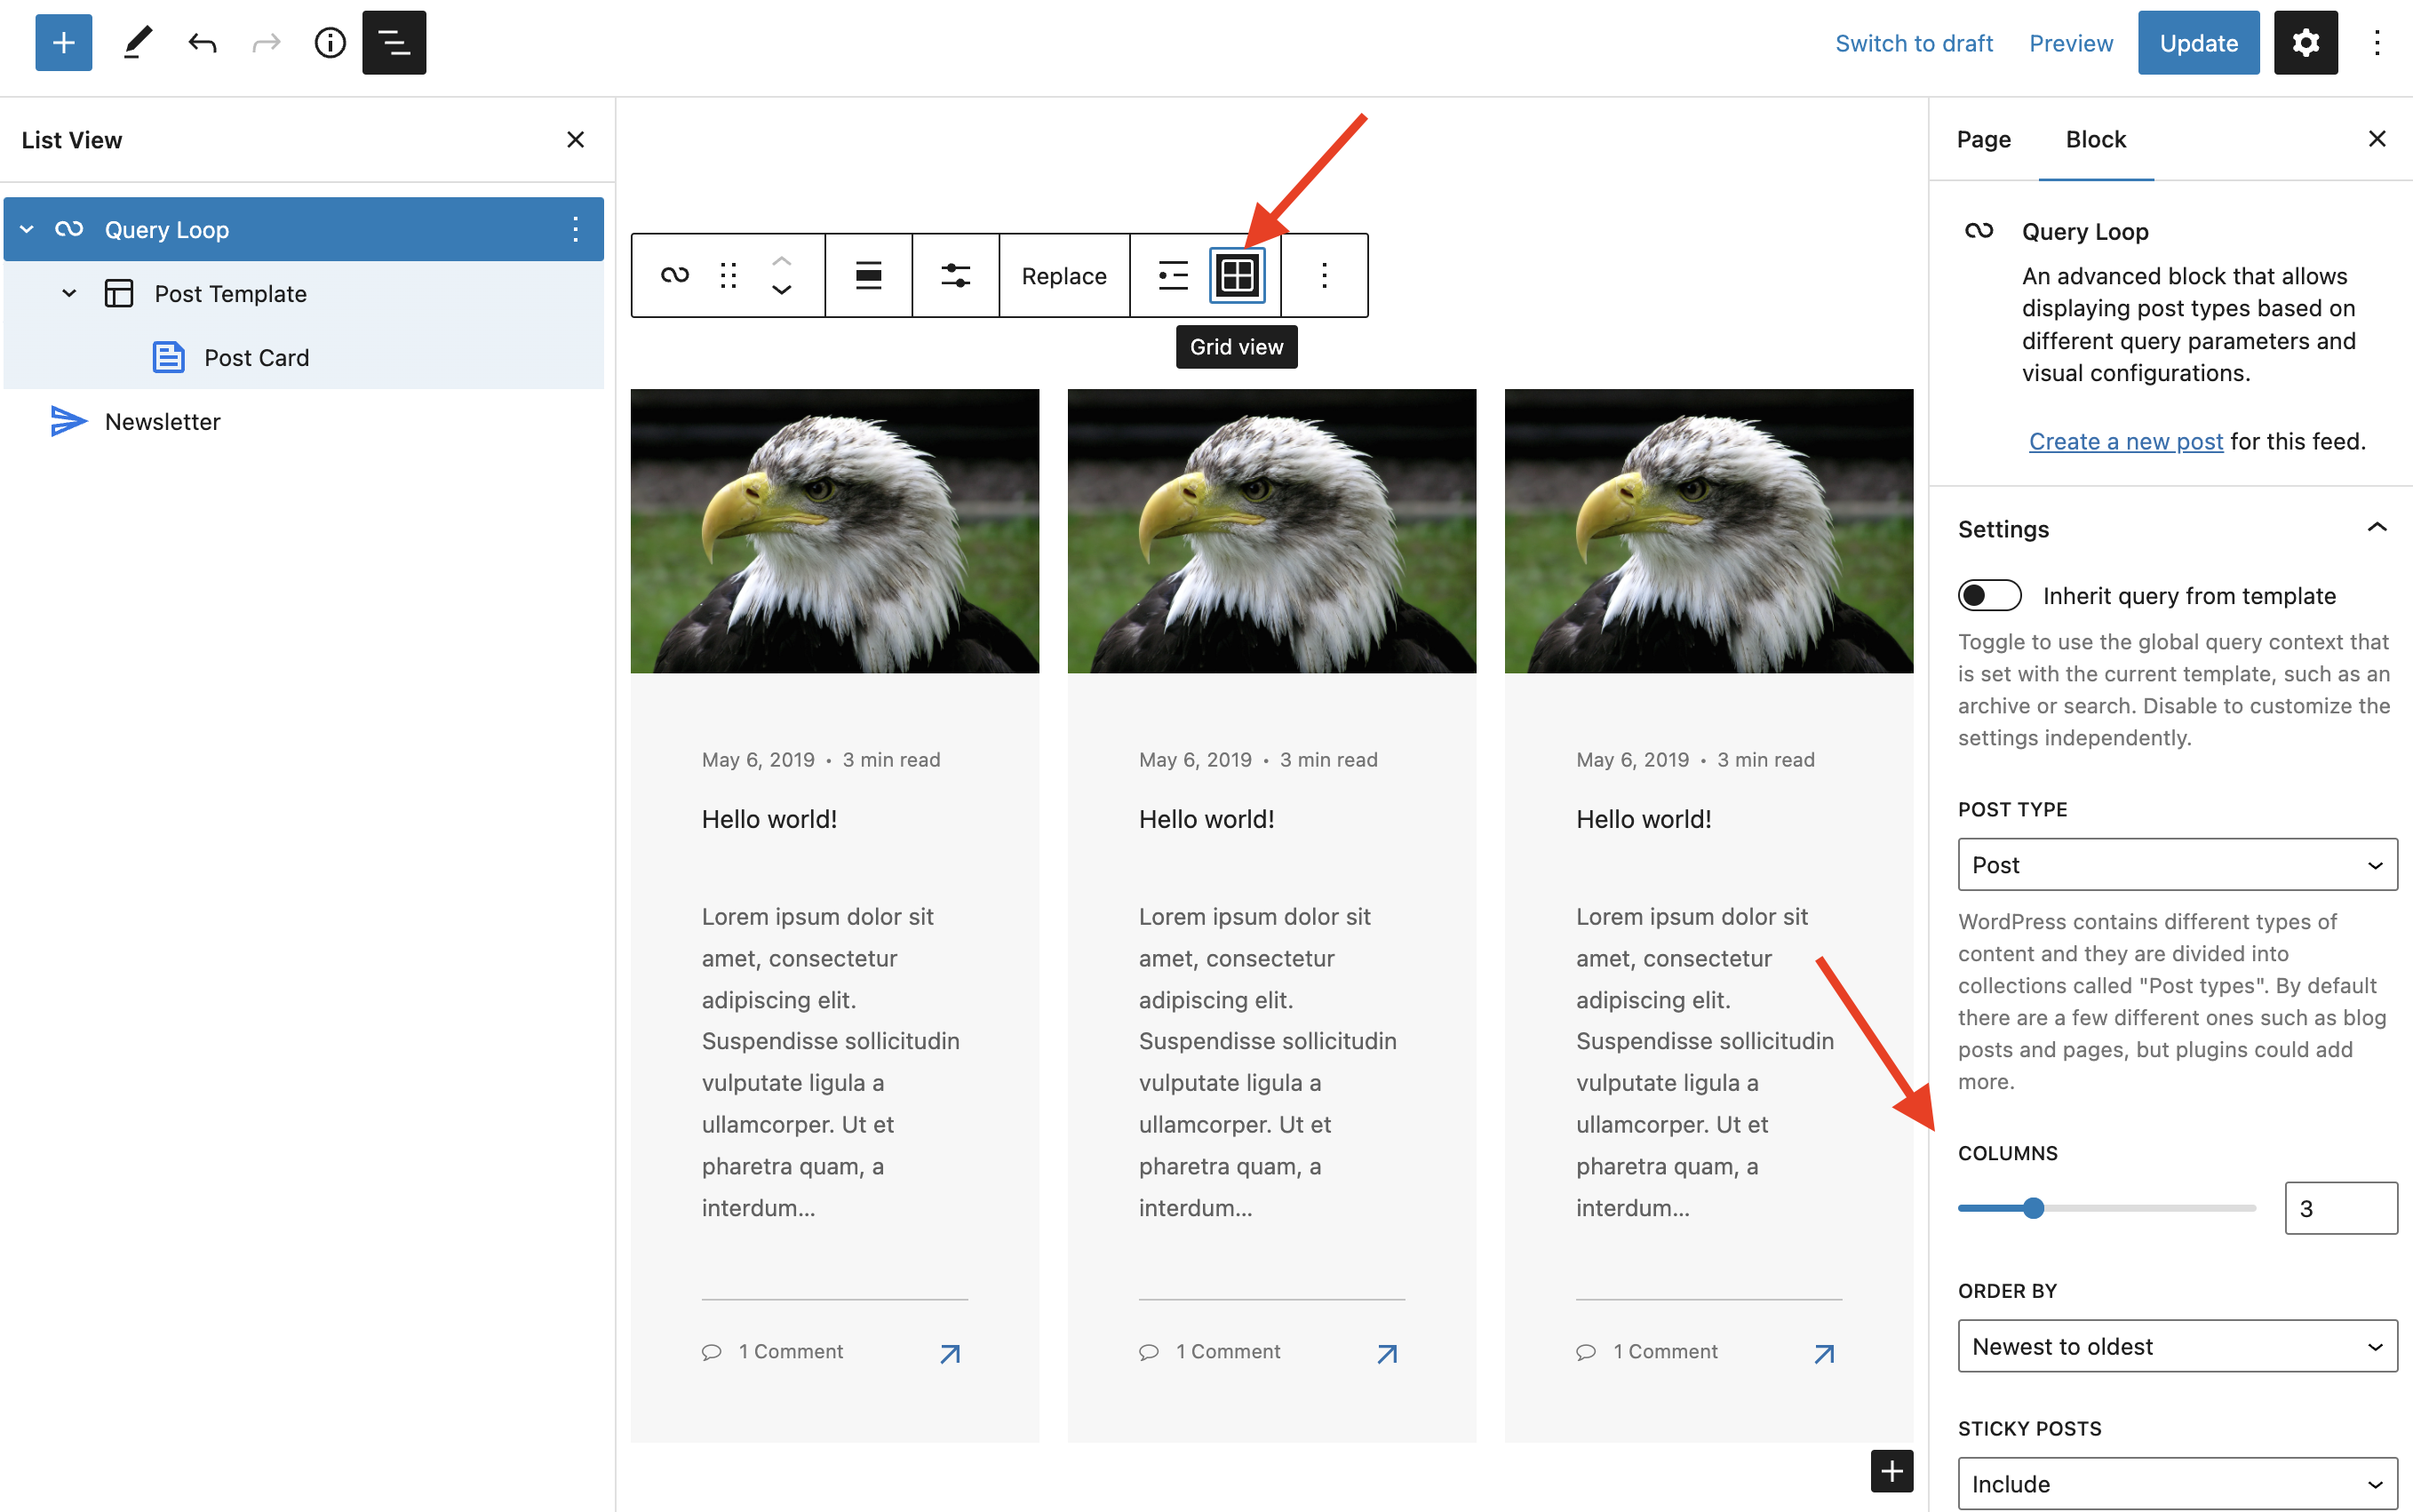
If you are using Gutenberg on your site and you wish to display posts on a page the way you would do this is via the “Query Loop” block. This block allows you to display posts and customize the loop of each entry. By default when you insert the Query Loop element it will display your posts in a “list” view but it is also possible to display posts in a grid.
To enable the grid view simply click to edit the “Query Loop” block and then click on the icon that looks like 4 little squares. See the screenshot below:
Better Grids via Total Utility Classes
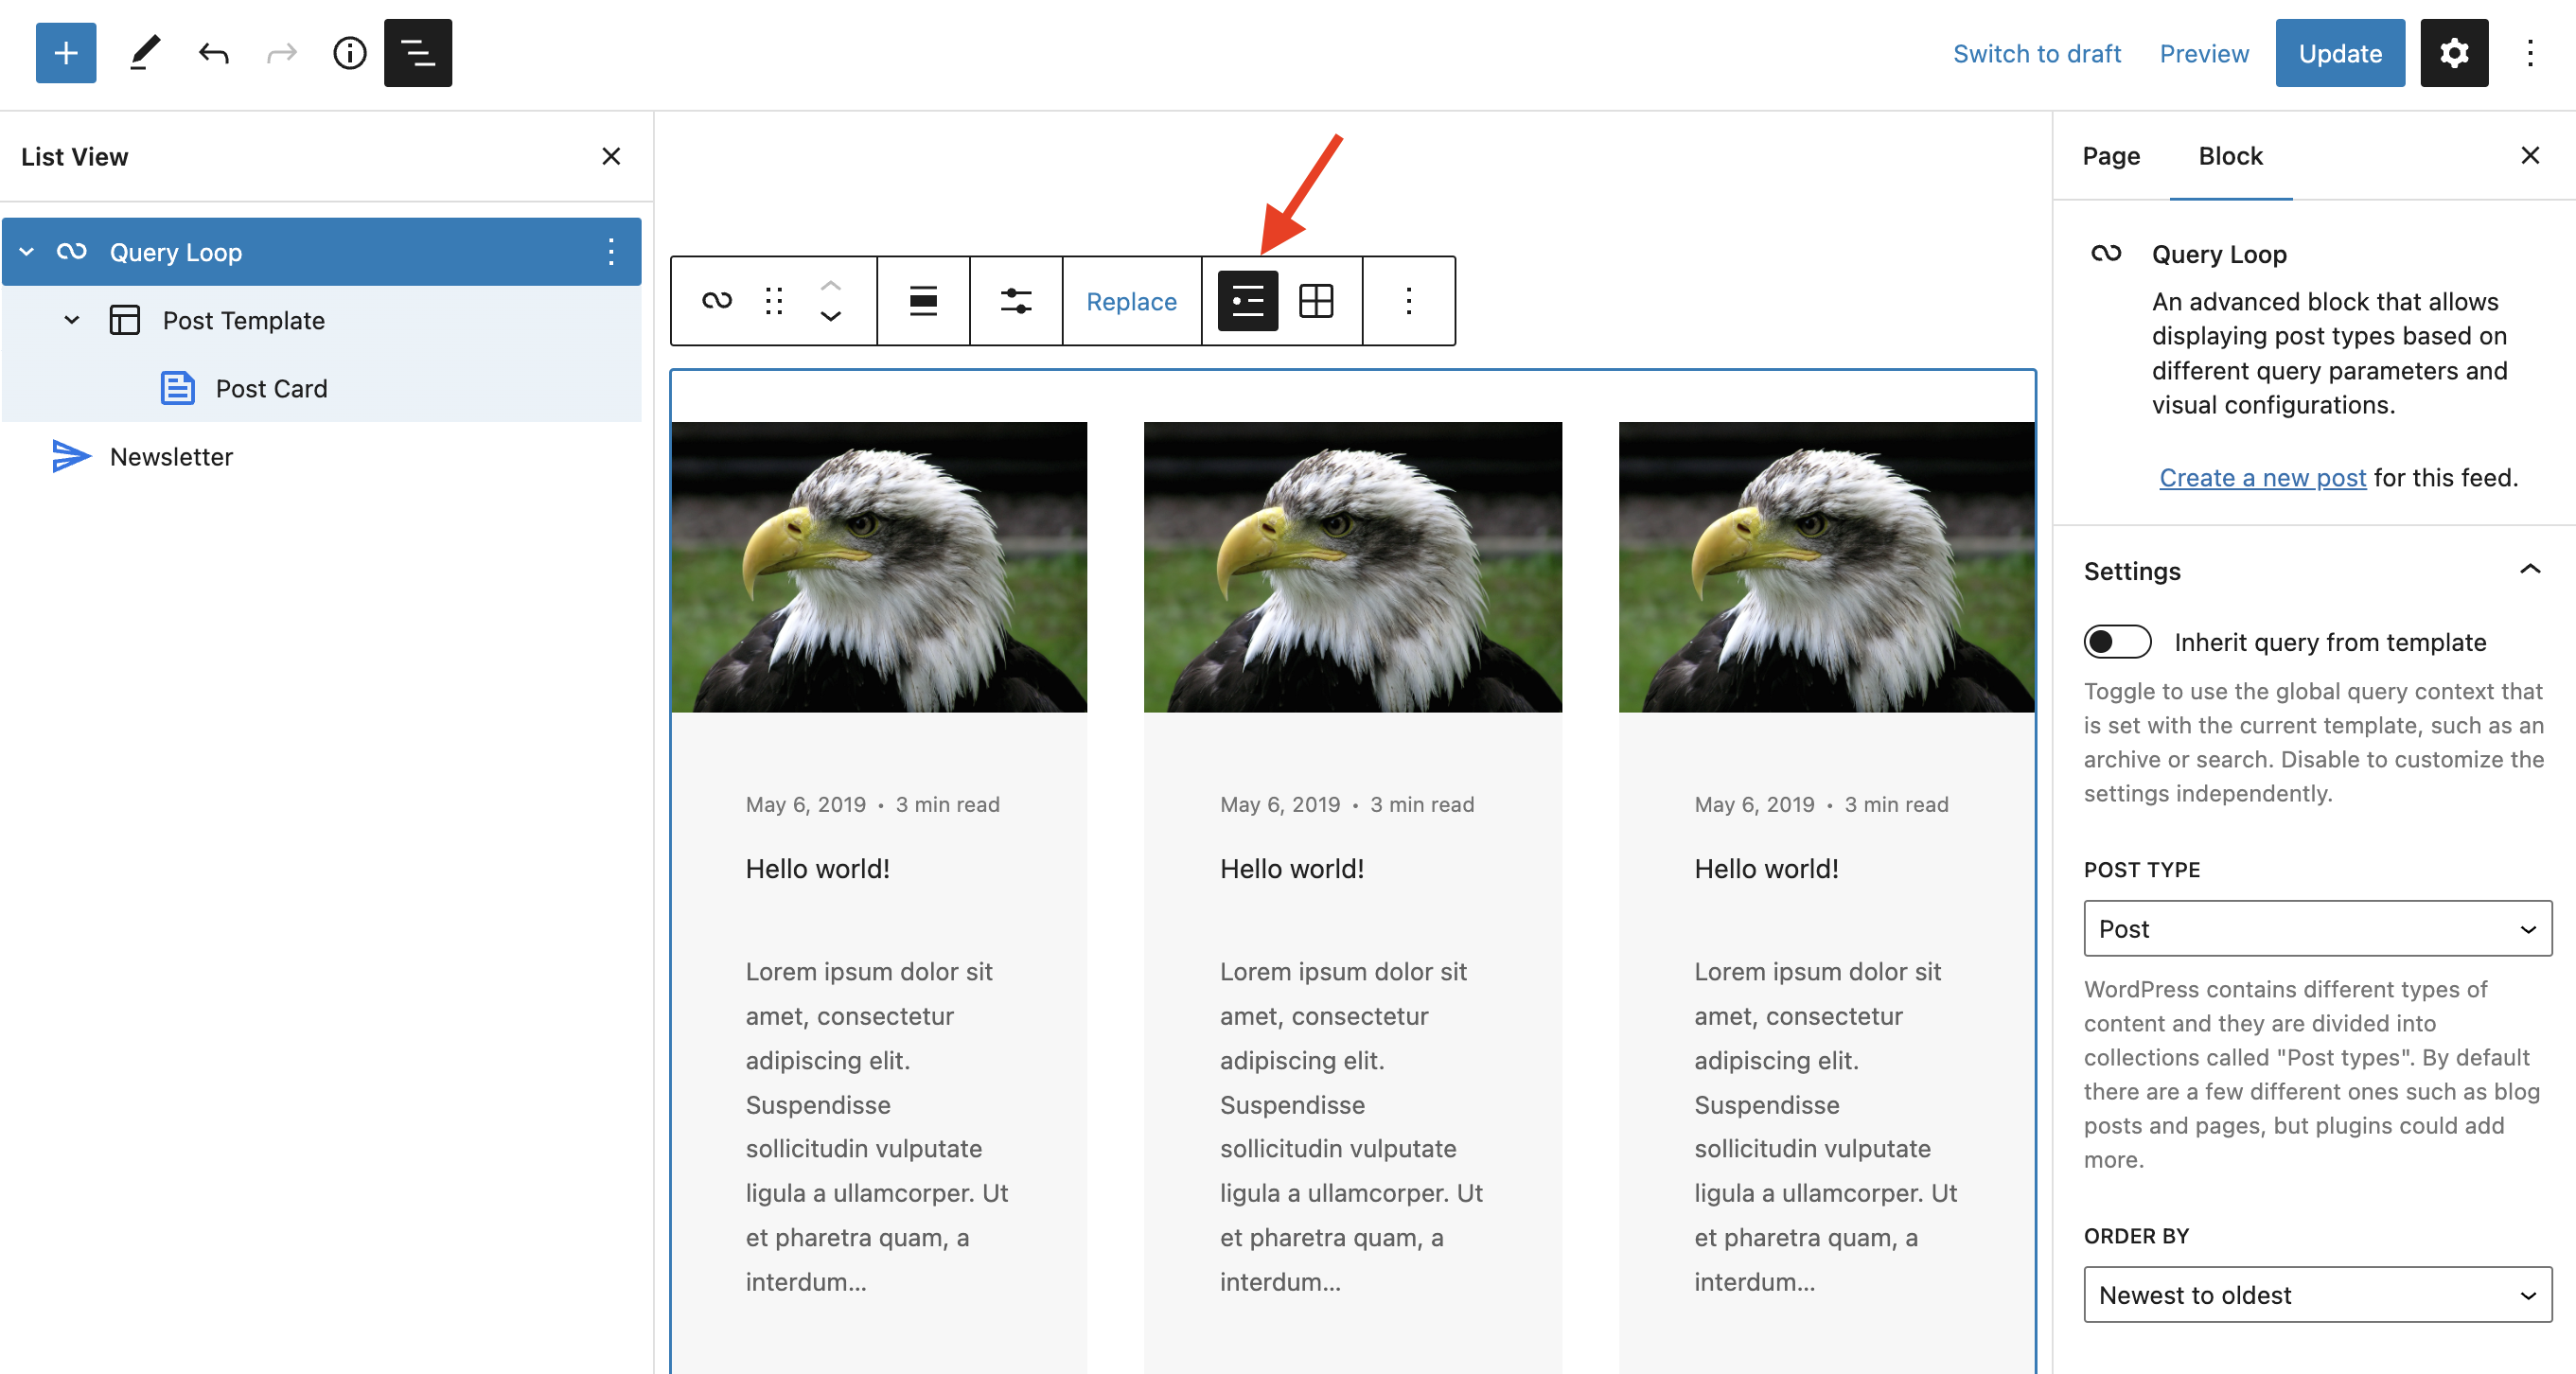
The default Query Loop grid element is very limited as it only lets you select the columns but you can’t (at the time of writing this article) choose your spacing or columns responsively. Luckily Total is a super comprehensive theme and includes a full CSS framework which can be used to give you greater control over the grid.
To use the theme’s grid classes simply change the Query Loop block back to “list” view and then click on the “Post Template” element and from here you can add the theme’s classes under the “Advanced” tab. See the screenshots below for referrance:
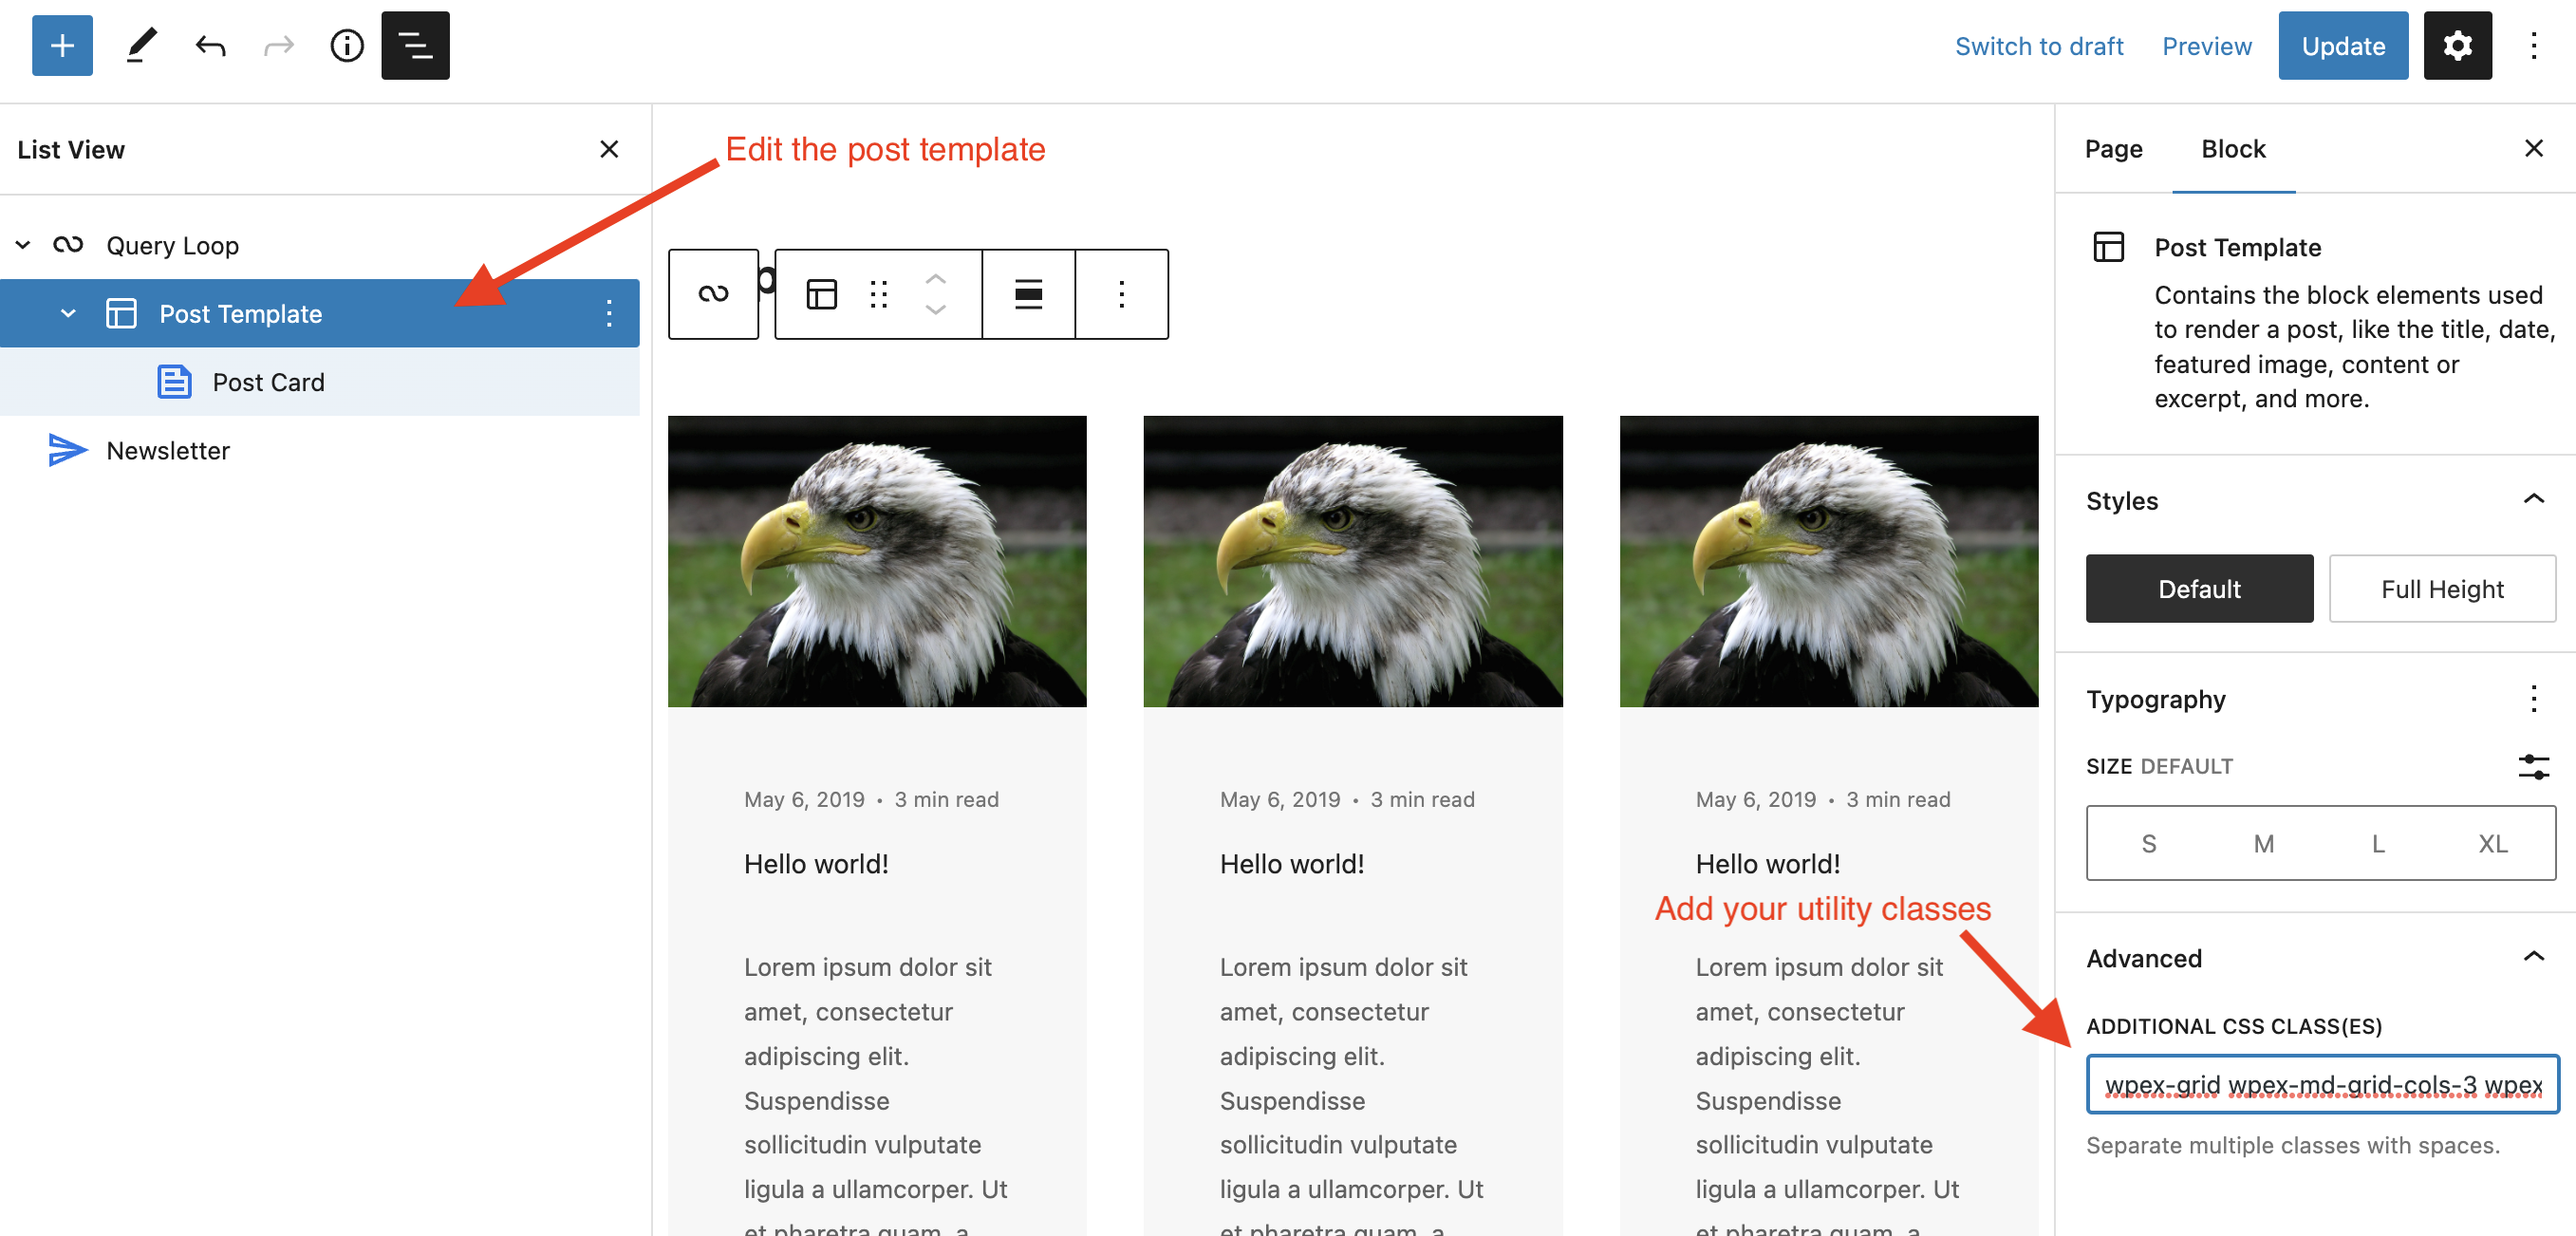
So in the example above I used the classes wpex-grid wpex-md-grid-cols-3 wpex-gap-30 which will make my grid a 3 column grid starting from the “md” breakpoint and give it a 30 pixel gap. If you are new to using the Total CSS utility classes you can find links to the relevant docs below: